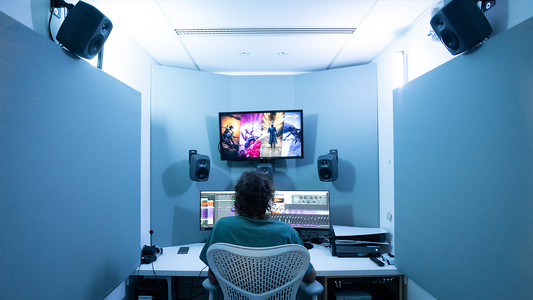
Shiny is our Psychedelic Neck Trainer, where you can play using your own music.
The objective is to destroy moving cubes, by simply looking at them.
As easy as it sounds it can get harder, when the screen is full of moving objects;)
We recently ported Shiny from Oculus Rift to GearVR and are presenting it at GDC using a Samsung Galaxy S6, running on Unity 5.3.
In this article I will talk about things I came across, while porting Shiny. Some of the mentioned methods
are quite general techniques to improve performance, since improving the framerate was the most important task. The GearVR (especially when you also want to run on Galaxy S4) is a lot slower then a powerful gaming PC behind an Oculus Rift.
Actually the port itself went really smoothly, since the game was allready made for Virtual Reality, but we had to improve our performance by a lot!
There was another interesting article on Gamasutra some days ago about bringing a game to GearVR so I recommend reading it as well.
I am aware, that I will explain stuff, which will be considered trivial by some people. However, I prefer explaining things which may be too basic, over not finding information needed, because it is considered to be too easy to write down.
General Stuff
- Clean up your project, especially when you are using a newer unity version.
We had the error ““CommandInvokationFailure: Unable to convert classes into dex format. See the Console for details.” caused by an old JDK somewhere in our project which clashed with the now (better) integrated development kit in Unity 5.3. The error could be fixed by finding vrlib and vrplatlib in our plugins and deleting these two files. In general this error means that you have some .jar file twice. It does not even mean that it must be in your project, but can also be in your unity installation. ou can try to find the file mentioned in the error and delete it (once) to solve this error. We did not notice the error earler, since there was no problem when building for Oculus Rift it only occurs, when building vor android.
There might also be some other old relics in your code which are no longer needed.
- Check the (external) tools used.
We used some DirectX 11 particle effects before, which were of course no longer working.
Sidenote: As of Unity 5.3 you can use gradients to set the color over time of a particle. One of the features we used the DirectX 11 particle effects for.
Additional the old Unity Shader we used for bloom was not working on (older) android devices, fortunately the newer BloomOptimized Shader will automatically use a mobile compatible Shader if needed.
- The resolution will be better (especially if you used an old Oculus Rift Development Kit), this means you might need to rescale some UI elements, and you might want to use textures with higher resolution as well. Sometimes even increasing the size of some hitboxes (on far away objects) makes sense, since it will be harder to hit them with your pointer. Additional you can make the used texts a bit smaller without causing them to become unreadable.
- Do not forget your GearVR keyfiles. Keep in mind that you need different ones, when you want it to run on several different Samsung Galaxys. Our game runs on Galaxy Note 4 and upwards, so we needed several keyfiles.
- Adjust the settings (for the music folder) when using GearVR. Before porting to GearVR we used a config file in unity to store the path to the music folder. On android this would still be possible, but a bit annoying since we would need to use the www functionality from Unity.
Fortunately on the Samsung Galaxy there is a standard path to the music folder: "/storage/emulated/0/Music" which we are using now.
In general it can be useful to have yome parts of the code behave differently depending on the platform it is running. Here a small example how you handle such a situation:
#if UNITY_ANDROID
	musicFolderPath = "/storage/emulated/0/Music";
#endif

#if UNITY_EDITOR
	musicFolderPath = File.ReadAllText (Application.streamingAssetsPath + "/folderconfig.txt");
#endif
- Change your input. The Sidebutton(click) can be used with MouseButton(0) and the Return button is mapped to “Escape”. Of course you can use more input, but you should ask yourself if this is really a good idea. We made the observation that a lot of people are already confused enough with VR such that a more complex input schemes can make a game quite inaccessible.
We used a double click as an input for some time, but it was not a good idea. Only using a normal click is better, since most people notice the click at some point, even if they do not read the tutorial messages!
Of course I also mention this, since your app should be able to use the back button in a consistent way, if you want to publish your app to the GearVR store.
Little Helper Android Debug Bridge
Since we needed to test our performance a lot, we needed to make a lot of builds and run them on a GearVR, since the results you get from it may not be the same as on the pc.
Using adb from the android development toolkit really helped to shorten the time between builds and of course it also helped to debug.
If you are not familiar with it, it is a program running in the shell which can install and debug your android programs on a connected android devise.
Our most used commands were:
-cd <Path>\Android\android-sdk\platform-tools
Getting to the correct folder in your shell to start using adb
-adb install -r <Path>\ShinyDev\Build\ShinySamsung.apk
Installing (and overwriting) Shiny to a connected mobile phone
-adb logcat *:S "Unity":D
Printing Unity Debug logs (and nothing else) from the android devise to the shell on the computer.
adb tcpip 5555
adb connect 192.168.X.XXX:5555
<Path> means the path to your folders and X.XXX stands for the IP of your phone in the wireless network.
Used to make a wireless connection to the android devise, this is especially useful when you have to put your android device in the GearVR.
Additional when you build your project make sure to select development build and autoconnect profiler (and set the profiler to deep profiling and adding the GPU window), to see the performance of your functions when running on the phone.
Optimization

Our performance before doing most optimizations.
You want your app to run with 75 frames/second, especially if you use the Oculus Rift pointer for controlling your game. Having lower frames can cause the game to feel imprecise, which is something we really wanted to avoid.
If you do not manage to get to 75 frames/second you will only get 37.5 frames which is often just not enough. (Well you can have some fast and some slow frames, but you want to have a consistent frame rate.)
I will talk now a lot about some basic optimization techniques, but in the end these little tricks are the reason we can run our game on GearVR with a good framerate.
OculusWaitForGPU and the 13.3 miliseconds
The GearVR will draw its frames once every 13.333 millisecond (which corresponds to 75 frames/second). If you miss this window, you will have to wait for the next frame meaning your frame will take 26.66 milliseconds (which coresponds to 37.5 frames/second). In the Unity profiler you will find under renderer the function“OculusWaitForGPU”. It seams that this process is making you slow, however this is mostly the waiting for the next frame. So all in all just try to be below 13.3 milliseconds per frame.
Memory and the Garbage Collector

The Garbage Collector hiding under the Update
When using the Unity Inspector and looking out for spikes in the framerate, you will often find the Garbage Collector, or sometimes you do not even find him (even with deep profiling it can occur, that you do not see him directly). Instead you see that some random process (allocating memory for the garbage collector) was slow.
This happens if the garbage collector starts his work during a process an, then the time he needs to do his work is added to the process which was disrupted.
This has two major consequences:
First be sure that the process you want to optimize is really slow (look at several frames/runs!) and was not just you looking at the garbage collector.
Second you do not want the garbage collector to be called often, since he will need 6-9 milliseconds to clean your memory and so you will most likely lose a frame each time he is called.
You may not be able to elude the garbage collector completely, but at least you can reduce the number of times he is called. In my opinion this is important, since every garbage collector call will lead to a spike in the time used for a frame, and such spikes is what causes framerate drops.
Calling the Garbage Collector manually

A transition in our game, a good time to call the garbage collector.
System.GC.collect lets the garbage collector run now. This can be a good idea to do when you have some points in your game, where it does not really matter if you have a slow frame.
In our game we can safely call the garbage collector, when changing a sequence or when having loaded the level. This may not make a big difference, but it can help a bit and can be done easily.
Reducing memory used:
Reducing the amount of memory used is not only good, to keep the garbage collector away, but it can also often speed up your game, since allocating memory can also be quite slow.
Of course it would always be best to program your game from the beginning in a way, such that it does not waste memory. However, often you want to have a working prototype first and or you are using some (not optimized) external tools. In such situations it may be a good idea to optimize the memory usage at a later point, as we did. Bellow are some easy ways we used to reduce our memory, if you want to know more you can find really nice guide here:
Functions calculating arrays:
When a function returns an array it will be copied and, therefore, a lot of extra memory is allocated and then given to the garbage collector.
An easy way to bypass this is to pass an array to the function and let it fill it instead.
This way the memory is not allocated twice and the garbage collector gets no extra work.
Farther below will be an example showing how you should calculate arrays in functions.
Reusing variables (especially Arrays):
If you need to calculate a certain value (or even an array of values) several times, it is better to instantiate your variable as a class variable and refill it every time.
So instead of allocating a new int array in every update, just create the array once, and fill the same old array again and again. If the array has a variable size, just keep an extra variable telling you how much is filled at a given time (and allocate it with the maximum needed space). Here is a combined example for the last two points.
Bad version:
using UnityEngine;
using System.Collections;

public class  ArrayExampleBad: MonoBehaviour {

	public int sequenceLength;
	public int sequenceLength2;
	public int strength;

	void Update(){
		int[] sequence1 = calculateSequence( sequenceLength);
		int[] sequence2 = calculateSequence( sequenceLength2);
		int minLength = (Mathf.Min(sequenceLength,sequenceLength2);
		int result = 0;
		for(int i=0; i<minLength; i++){
			result = result +  sequence1[i]+sequence2[i];
		}
	}

	int[] calculateSequence(int length){
		int [] temp = new int [length];
		for(int i=0;i<length;i++){
			temp[i] = length-i; // just a simple example!
		}
		return temp;
	}
}
Better Version:
using UnityEngine;
using System.Collections;

public class  ArrayExampleLessBad: MonoBehaviour {

	static inc MaxLength = 200; // depends on your max expected Length
	public int sequenceLength; //Now also used to count the length of the array
	public int sequenceLength2; //Now also used to count the length of the array
	public int strength;
	int[] sequence1 = new int[MaxLength];
	int[] sequence2 = new int[MaxLength];

	void Update(){
		calculateSequence(sequence1, sequenceLength);
		calculateSequence(sequence2, sequenceLength2);
		int minLength = (Mathf.Min(sequenceLength,sequenceLength2);
		int result = 0;
		for(int i=0; i<minLength; i++){
			result = result +  sequence1[i]+sequence2[i];
		}
	}

	void calculateSequence(int[] aSequence, int length){
		for(int i=0;i<length;i++){
			aSequence[i] = length-i; // just a simple example!
		}
	}
}
The second version is called less bad, since it could be optimized further, one examle would be to calculate the strength only when the sequenceLength changes, instead of calculating it in every Update. An example for something similar is given further down under Strings.
Using Arrays instead of Lists
When adding an element to a list, and then deleting it again, there is always some extra memory allocated and given free. If you use an array instead this is not the case and you can additionally use the two “tricks” mentioned above, to further minimize the amount of memory used.
Naturally there are some situations when having a List makes more sense, however, often you can use an array instead of a list if you use an additional variable to keep track of the number of used elements. Above this was done by “abusing” the two variables sequenceLength and sequenceLength2.
Strings and setters
Often you may want to use some strings for displaying information in your GUI. This makes sense and cannot really be evaded. Nevertheless you should try to not allocate too many strings. Especially concatenating strings and